Image Source: i.ytimg.com
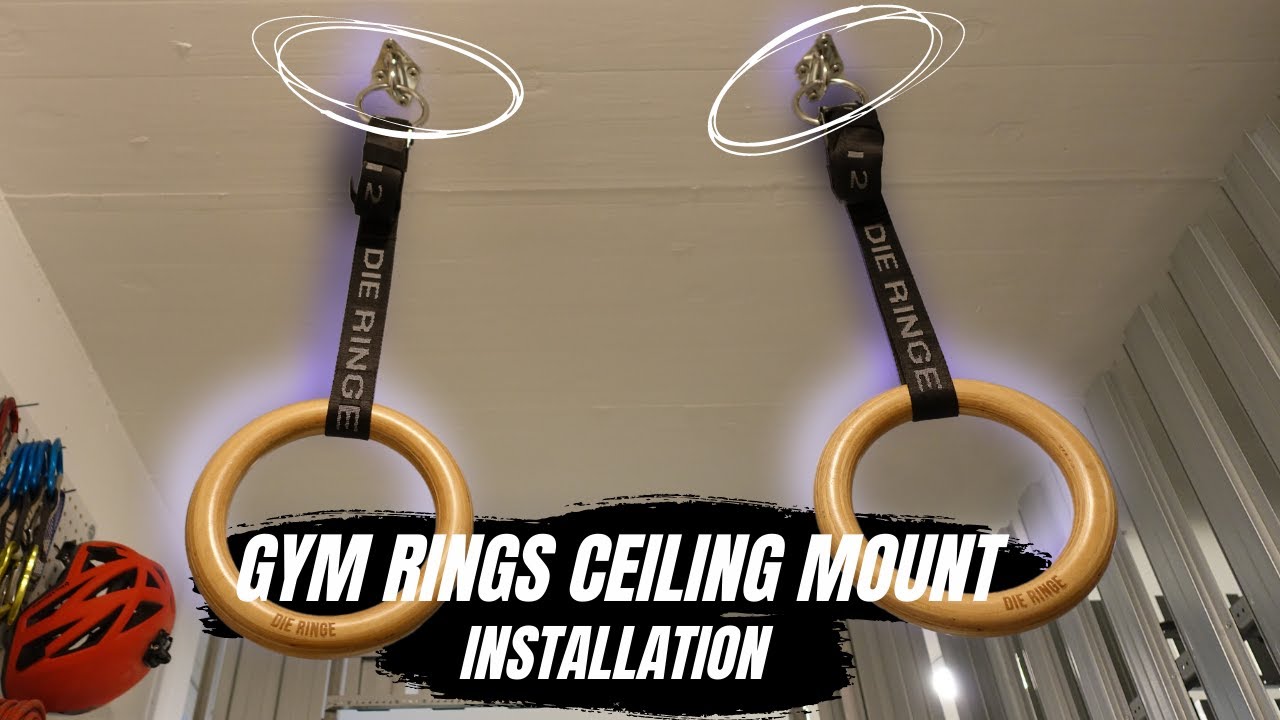
Learn how to hang gymnastic rings from ceiling safely!
Can you hang gymnastic rings from any ceiling? No, you cannot. You must pick a strong part of your ceiling that can hold a lot of weight. What tools do you need to hang them? You will need basic tools like a drill, a stud finder, and the right strong hardware. Is it really safe to hang gymnastic rings at home? Yes, it is very safe if you follow strict safety steps and use the correct equipment for your home setup. This guide will show you how to do it the right way, making sure your home gym is safe and ready for action.
Hanging gymnastic rings in your home is a great way to build strength, improve balance, and get a full-body workout. They are versatile and can be used for many exercises, from basic pulls to advanced bodyweight moves. But before you start, it is very important to make sure they are hung safely and securely. A wrong setup can lead to serious injury. This guide will help you put up your rings correctly, step by step, focusing on safety at every turn. We will look at different ceiling types, the right gear to use, and how to do the job well.
Grasping the Power of Gymnastic Rings
Gymnastic rings are not just for trained athletes. They are a powerful tool for anyone wanting to get stronger. They force your muscles to work harder because they are not stable. This means your body has to use many small muscles to keep steady.
Benefits of Using Rings
- Whole Body Strength: Rings make you use your whole body, not just one muscle group.
- Better Balance: Because they move, you learn to balance better.
- More Muscle Control: You get better at controlling your body in space.
- Joint Health: Many ring exercises are gentle on your joints.
- Fun Workouts: They make exercising more exciting and challenging.
Safety First: The Most Important Rule
When hanging anything from your ceiling that will hold your body weight, safety is the number one concern. This is not a task to rush or guess at. The goal is to create a secure overhead suspension system. This means that every part, from the ceiling itself to the hooks and ropes, must be strong enough to hold not just your weight, but also the extra force from your movements. Think about how much force is put on the system when you swing or jump. It can be much more than your body weight.
It is very important to identify load bearing ceiling points. These are the parts of your ceiling that are built to hold heavy weights. Usually, these are wooden joists or steel beams. Never hang rings from just drywall, plaster, or a false ceiling. These materials cannot hold the necessary weight and will fail, possibly causing serious injury. Your gymnastic ring structural support must come from the actual frame of your building.
Key Safety Principles
- Know Your Ceiling: Different ceilings need different ways to hang rings.
- Overestimate Weight: Always assume the rings will hold more than just your body weight.
- Use the Right Gear: Do not use cheap or weak hooks and bolts.
- Check Everything Twice: Before you use the rings, test them carefully.
- Seek Help: If you are unsure, ask a builder or expert for advice.
Deciphering Your Ceiling Type
The first and most important step is to figure out what your ceiling is made of. This will tell you how to find strong points and what hardware you need. Most homes have either wood or concrete ceilings.
Wooden Ceilings and Joist Power
Many homes have wooden ceilings. These ceilings are built with strong wooden beams called joists. These joists run across the ceiling and hold up the floor above. They are the load bearing ceiling points you need to find.
Finding Joists:
* Stud Finder: This is the easiest way. A stud finder is a small tool that finds wood or metal behind walls and ceilings.
* How to Use: Turn it on. Place it flat against the ceiling. Move it slowly across the ceiling. It will beep or light up when it finds a joist. Mark the edges of the joist.
* Tip: Joists are usually 16 or 24 inches apart. Once you find one, you can often measure to find the next.
* Tapping Method: If you do not have a stud finder, you can tap the ceiling. A hollow sound means drywall. A solid sound means you are hitting a joist. This method is not as exact.
* Looking for Clues: Sometimes, you can see faint lines where nails or screws go into the joists, or slight bumps in the paint.
* Light Fixtures: If you have a light fixture, it is usually screwed into a joist or a wooden block between joists. This can give you a starting point.
Ceiling Joist Installation: Once you find the joists, you must drill into their center. This provides the strongest hold. For wood beam mounting, you will usually use long lag bolts or screws that go deep into the joist. The thicker the bolt, the better the grip.
Concrete Ceilings and Strong Anchors
Concrete ceilings are very strong. They are often found in basements, garages, or apartment buildings. While strong, they need special hardware to hang anything. You cannot just screw into concrete.
Using Concrete Ceiling Anchors:
* Drill Bit: You will need a hammer drill and a masonry drill bit. The size of the drill bit must match the size of your concrete anchor.
* Anchor Type: There are many types of concrete anchors.
* Wedge Anchors: These are common and expand when tightened, holding firmly in the concrete.
* Sleeve Anchors: Similar to wedge anchors, good for heavy loads.
* Drop-in Anchors: These sit flush with the surface and use a machine screw.
* Installation:
1. Mark your spots.
2. Drill a hole to the correct depth and size using your hammer drill.
3. Clean out the dust from the hole.
4. Insert the concrete ceiling anchor.
5. Tighten it according to the maker’s instructions.
6. Attach your heavy duty ceiling hooks to the anchors.
Important Note: If your ceiling is made of steel beams, or if you are unsure about your ceiling type, it is best to get help from a professional builder or structural engineer. They can tell you the best way to hang your rings safely.
Choosing the Right Hardware: Your Home Gym Ceiling Hardware
The hardware you use is just as important as finding the right spot in your ceiling. Do not cut corners here. Cheap hardware can fail and cause injury. You need home gym ceiling hardware that is rated for high weight.
Heavy Duty Ceiling Hooks
These are the most common way to hang rings. Look for hooks that are:
* Made for High Weight: Check the weight capacity gymnastic rings hardware. It should be much higher than your body weight. For example, if you weigh 200 lbs, you want hooks rated for at least 400-600 lbs each, or even more, to account for dynamic forces.
* Closed Loop: Hooks that form a closed loop are safer than open-ended hooks. This stops the straps from slipping off.
* Strong Material: Stainless steel or other strong, rust-proof metals are best.
* Mounting Type: Make sure the hook is designed to be screwed into wood joists or attached to concrete anchors. Some come with a plate and multiple bolt holes for a more secure connection.
Other Home Gym Ceiling Hardware You Might Need
- Carabiners: These are strong metal clips. Use them to attach the ring straps to the ceiling hooks. Make sure they are also heavy duty and rated for climbing or gym use.
- Adjustable Straps: The rings themselves come with long, adjustable straps. Make sure these are also high quality.
- Washers: Use washers under the heads of lag bolts when mounting into wood. They help spread the load and keep the bolt from sinking into the wood.
- Lock Nuts/Threadlocker: If using bolts with nuts, consider lock nuts or a thread-locking fluid to stop them from loosening over time.
Table 1: Essential Home Gym Ceiling Hardware
| Item | Purpose | Key Features to Look For |
|---|---|---|
| Heavy Duty Ceiling Hooks | Main attachment point to ceiling | High weight capacity (e.g., 500+ lbs per hook), closed loop, strong metal, correct mounting type (wood/concrete). |
| Carabiners | Connect ring straps to ceiling hooks | High weight capacity (climbing rated), locking mechanism, strong metal. |
| Concrete Ceiling Anchors | For mounting hooks into concrete ceilings | Matched to hook size, correct type (wedge, sleeve, drop-in), high weight capacity. |
| Lag Bolts/Screws | For mounting hooks into wood joists | Long enough to go deep into joist (e.g., 3-4 inches), thick diameter, strong material. |
| Adjustable Ring Straps | Suspend the rings from the hooks | Durable nylon or polyester, strong buckles, good length adjustment. |
| Washers | Used with lag bolts | Large diameter, metal, helps spread load and prevent sinking. |
Finding the Right Spot: Planning Your Space
Once you know your ceiling type and have the right hardware, the next step is to plan where your rings will hang. This involves finding the right joists or spots and making sure you have enough space.
Locating Ceiling Joists and Proper Spacing
For ceiling joist installation, you need to find two joists that are spaced correctly. The ideal width for gymnastic rings is usually between 18 and 22 inches apart, measured from the center of each hook. Some people prefer closer or wider, but this range is common and allows for most exercises.
- Measure First: Use your stud finder to mark several joists. Then, use a tape measure to find two joists that are roughly 20 inches apart.
- Check for Obstacles: Make sure there are no pipes, wires, or other obstacles in the way where you plan to drill.
- Consider Clearance:
- Height: How high do you want the rings? You need enough space to hang, do pull-ups, and perhaps even dips or inversions. Think about the maximum height of your ceiling and how low you want the rings to be. Remember, the straps are adjustable.
- Floor Space: You need clear floor space below the rings. Make sure there are no chairs, tables, or walls that you could hit.
- Side Space: Ensure you have enough room to swing a little without hitting walls or other objects.
Secure Overhead Suspension: The Principles
The goal is always secure overhead suspension. This means:
1. Directly into Structural Elements: Always mount into joists (wood) or directly into solid concrete with anchors. Never into drywall alone.
2. Perpendicular Loading: The force should pull straight down from the hook. Avoid angles that could put twisting or shearing forces on the hook or the joist.
3. Redundancy (Optional but Recommended): Some people use mounting plates with multiple bolts per hook for even more security, especially for very heavy users or dynamic moves.
Doing the Job: Step-by-Step Installation Guide
Now that you have planned everything, it is time to install your rings. Take your time with each step.
1. Gather Your Tools
Having all your tools ready before you start saves time and makes the job easier.
Table 2: Tools You Will Need
| Tool | Purpose | Notes |
|---|---|---|
| Stud Finder | To locate wood joists in the ceiling | Essential for wooden ceilings. |
| Tape Measure | To measure distance between hooks and clearance | To ensure proper spacing. |
| Pencil | To mark drilling spots | Clearly mark your spots. |
| Drill | To pre-drill holes | A strong drill is needed. A hammer drill for concrete. |
| Drill Bit Set | For pre-drilling pilot holes (wood) or concrete holes | Drill bit size for rings must match your hardware. Always check hardware instructions. |
| Socket Wrench or Impact Driver | To tighten lag bolts (wood) or concrete anchors | Ensures bolts are fully tightened. |
| Safety Glasses | To protect your eyes from dust and debris | Always wear these when drilling. |
| Step Ladder | To reach the ceiling safely | Make sure it is sturdy. |
| Vacuum Cleaner | To clean up dust after drilling (especially concrete) | Important for concrete anchor success. |
| Safety Rope (Optional) | For initial testing of setup | Can be used to hang weight before human use. |
2. Mark Your Drilling Spots
- Find Joists (Wood Ceilings): Use your stud finder to mark the edges of two joists that are about 18-22 inches apart. Then, find the center of each joist and mark that spot. This is where you will drill.
- Mark Spots (Concrete Ceilings): Choose two spots that are 18-22 inches apart on your concrete ceiling. Mark them clearly. There is no need to find joists in concrete.
3. Pre-Drill Pilot Holes (Wood) or Drill for Anchors (Concrete)
This is a very important step.
- For Wood Beam Mounting:
- Choose the correct drill bit size for rings lag bolts. The drill bit should be slightly smaller than the shank (the smooth part) of your lag bolt, but larger than the core (the threaded part) of the bolt. This allows the threads to bite into the wood without splitting it. Your lag bolt instructions should tell you the right drill bit size.
- Drill a pilot hole at each marked spot. Drill deep enough so that the lag bolt can go in fully.
- For Concrete Ceiling Anchors:
- Choose the correct masonry drill bit size for rings anchors. This size will be specific to your chosen anchor type.
- Attach the masonry bit to your hammer drill.
- Drill a hole at each marked spot. Drill to the exact depth specified by the anchor manufacturer. Use a piece of tape on your drill bit as a depth guide.
- After drilling, use a vacuum cleaner to remove all dust from the hole. This is critical for the concrete anchor to hold correctly.
4. Install the Hooks/Anchors
- For Wood Ceilings:
- Place a washer over the lag bolt.
- Line up your heavy duty ceiling hooks with the pilot holes.
- Screw the lag bolts through the hooks and into the pre-drilled holes. Use a socket wrench or impact driver to tighten them down firmly. Make sure they are snug and do not wobble. Do not overtighten, as this can strip the wood.
- For Concrete Ceilings:
- Insert the concrete ceiling anchors into the cleaned holes.
- Follow the anchor’s specific instructions for setting it. Some you tap in, some you tighten to expand.
- Once the anchors are set, attach your heavy duty ceiling hooks to them, usually by screwing them in or bolting them on. Make sure they are very tight.
5. Attach and Adjust Rings
- Clip your carabiners onto the installed heavy duty ceiling hooks.
- Feed the gymnastic ring straps through the carabiners and adjust them to your desired height.
- Ensure both rings are at the same height.
6. Test the Setup
This is the final, vital safety step.
* Hang Slowly: Do not jump onto the rings right away. Gently hang your full body weight from the rings.
* Add Movement: Slowly add some gentle movements, like a small swing or a slight pull-up, to make sure nothing moves or creaks.
* Check for Looseness: After a few minutes of light testing, check the hooks and straps for any signs of loosening or stress. Everything should feel rock solid.
* Repeat for Each Hook: Test each hook and ring individually if possible, then together.
Care and Keeping: Maintenance and Inspection
Once your rings are up, your job is not over. Regular checks ensure continued safety.
Daily Checks
- Strap Condition: Before each use, quickly check the straps for any cuts, fraying, or wear.
- Buckle/Clasp: Ensure the buckles are clean and clamp tightly.
- Ring Surface: Check the rings themselves for cracks or splinters (if wood).
Monthly Checks
- Hook Tightness: Get on a ladder and check that the heavy duty ceiling hooks are still tight in the ceiling. If they are lag bolted into wood, try to turn them by hand. If they move, gently tighten them with a wrench. If they are concrete anchors, ensure the bolts are snug.
- Carabiner Operation: Make sure the carabiners open and close smoothly and lock properly.
- Ceiling Area: Look for any new cracks or signs of stress around the hook mounting points on the ceiling. This could mean the gymnastic ring structural support is weakening.
What to Do If You Find an Issue
If you find any significant wear, damage, or looseness:
* Stop Using Immediately: Do not use the rings until the issue is fixed.
* Replace Parts: If a strap is frayed or a carabiner is sticky, replace it. Do not try to repair it.
* Re-Evaluate Mounting: If a hook feels loose, you may need to remove it, inspect the hole and the hook, and possibly re-install it with new hardware or in a slightly different spot if the wood or concrete is damaged. When in doubt, call a professional.
Expert Tips for Safety and Longevity
- Over-Specify: Always choose hardware that has a much higher weight capacity gymnastic rings than you think you need. Dynamic movements can put 2-3 times your body weight force on the hooks.
- Lighting: Make sure the area is well lit. You need to see what you are doing.
- Padding: Consider placing a soft mat or crash pad on the floor below your rings, especially when learning new moves.
- Footwear: Some people prefer to use rings barefoot for better grip and feel.
- Warm-Up: Always warm up your muscles before a ring workout.
- Listen to Your Body: Do not push through pain. Proper form is more important than doing many reps.
- Cleanliness: Keep your rings and straps clean and dry. Sweat and dirt can degrade materials over time.
- Professional Help for Complex Setups: If you live in an older house, a house with unusual construction, or are simply unsure about your ceiling’s strength, it is worth hiring a structural engineer or a skilled builder to inspect the load bearing ceiling points and advise on the best gymnastic ring structural support. They can ensure your home gym ceiling hardware is installed perfectly.
By following these detailed steps, you can create a safe, strong, and lasting setup for your gymnastic rings. Enjoy your new home gym and the incredible strength you will build!
Frequently Asked Questions (FAQ)
Q1: How far apart should gymnastic rings be?
A1: Most people find that hanging gymnastic rings about 18 to 22 inches apart (center-to-center) is ideal. This spacing allows for a good range of exercises and comfortable shoulder width.
Q2: Can I hang gymnastic rings from a pull-up bar?
A2: Yes, many people hang gymnastic rings from a sturdy pull-up bar that is securely mounted to a wall or doorframe. Make sure the pull-up bar itself is rated for the combined weight of you and the added dynamic forces from the rings.
Q3: What kind of drill do I need for concrete?
A3: For concrete, you need a hammer drill. A regular drill will not be strong enough to make holes in concrete for anchors. You will also need a masonry drill bit of the correct size for your concrete anchors.
Q4: How do I know the weight capacity of my ceiling?
A4: Determining the exact weight capacity of your ceiling is hard without an expert. However, if you are mounting into strong, correctly spaced wood joists or directly into solid concrete with the right anchors, it is generally safe for one person’s body weight during exercise. Always make sure your heavy duty ceiling hooks and concrete ceiling anchors themselves have a very high weight rating (often 500-1000 lbs each) to cover dynamic forces. If in doubt, consult a structural engineer.
Q5: What if I don’t have a stud finder?
A5: While a stud finder is the easiest way to find wood joists, you can try tapping the ceiling. A hollow sound means drywall, a solid sound suggests a joist. You can also look for lines of nail heads or screws. However, these methods are less precise, and a stud finder is highly recommended for safety.
Q6: Can I hang rings from a false ceiling or plasterboard?
A6: Absolutely not. False ceilings (like drop ceilings) and plasterboard (drywall) cannot support body weight. You must mount directly into the structural elements of your building, such as wood joists, concrete, or steel beams, to ensure secure overhead suspension. Trying to hang rings from these materials will lead to immediate failure and serious injury.
Q7: How high should I hang my gymnastic rings?
A7: The ideal height depends on your height and the exercises you plan to do. For pull-ups and dips, you want them high enough so you can hang with straight arms without your feet touching the ground. For exercises like ring push-ups or rows, you might want them lower. The adjustable straps let you change the height for different exercises. Many people hang them as high as their ceiling allows and adjust down.